8:00 am - 5:30 pm
Step 1:
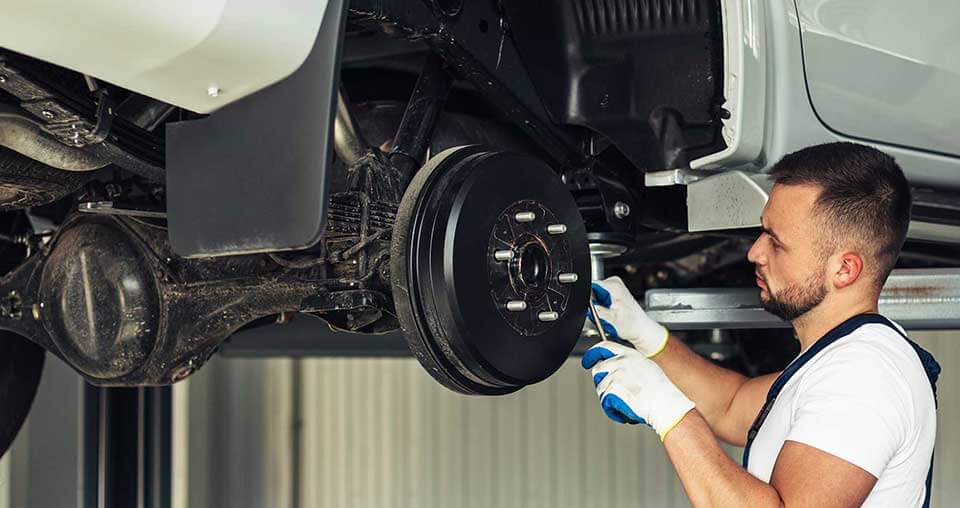
Removing the Wheel
Step 2: Remove Old Brake Pads and Open Piston
Step 3: Installing New Brake Pads
Step 4: Close Up the Caliper
Step 5: Reattach the Wheel
Step 6: Test Brakes and Discs
Did you know that 80% of your braking power comes from your front brakes? That’s the reason why your front brakes wear out quicker than your rear ones. And, with the important job that your brakes do in ensuring the safety of you and your passengers, it’s essential to replace them as soon as you notice an issue with them. This could be that the brake pads have worn down to the specified minimum level, a loud screeching or clunking noise every time you press the brake pedal or reduced braking efficiency.
While replacing your brake discs is a relatively straightforward job, there are quite a few steps to follow and you need to be careful to ensure nothing goes wrong. If you are in any doubt, contact a qualified mechanic.
It’s recommended to always change your brake discs in pairs (i.e. both front brake discs together, or both rear ones) to avoid uneven braking.
Take a look at your existing brake discs to determine what exactly needs to be replaced – the brake pads, the calipers, the brake disc (also known as rotors) or all of these components. It’s a good idea to purchase more parts than you think you’ll need, as it’s a lot easier to get parts before you start work. Plus, as long as you keep the receipt and the boxes are clean and undamaged, you should be able to return any unneeded parts later.
Park the car in your workspace and engage the park / emergency brake or put a wooden block behind the rear wheels (or behind the front wheels if you’re working on your rear wheels).
Loosen your front lug nuts, but do not remove them yet.
Jack the car up and lower it onto the jack stands. Remember to make sure the jack stands are under a strong part of the car, like the frame or subframe. If you’re not sure where to place the jack stands, consult your owner’s manual.
After checking that the jack stands are correctly placed, remove the wheels. It’s a good idea to put the removed wheels under car, just behind the jack stands so that if the car slips off the jack stands, the car will land on the wheels and not on you.
Remove the two bolts that hold the caliper in position and slide the caliper out. If it doesn’t come out easily, use a small pry bar. Use tie clips to hold the caliper on the suspension so it doesn’t put any strain on the brake line and cannot fall.
Remove the two bolts on the rear of the hub that hold the caliper carrier in place. These are usually extremely tight, so it’s a good idea to use a breaker bar or an impact gun.
Remove the brake pads and inspect them for wear. Apply anti-squeal grease to the backing of the new brake pads. Be careful not to get any grease on the brake discs or friction linings of the brake pads.
Check the brake disc for a locating screw and, if there is one, unscrew it before hitting the brake disc with a hammer to remove it.
Check the brake disc. Resurface with a crosshatch pattern if still within specifications or replace if the brake disc is too thin to resurface. Resurfacing is usually done at a machine shop or auto parts store.
Use a wire brush to clean the rust off the hub to prevent future corrosion.
Install the new (or resurfaced) brake disc (including the location screw, if there is one), making sure it sits flush.
Replace the calipers (if necessary). Remember to install all bleeder fittings and screws in the upper or top position or it won’t be possible to bleed the brakes later. If you replace the calipers, it’s a good idea to also replace the brake hoses.
Replace the carrier bolts and tighten them with a breaker bar or impact gun.
Use the C-clamp and an old brake pad to compress the caliper piston until it is flush with the housing of the caliper. Remember to cap off the brake reservoir to reduce the risk of blowing a line and to prevent contamination from entering the line. Clean up any brake fluid that may have come out of the reservoir as brake fluid can damage or remove the paint on your car if it’s not cleaned up quickly.
Install the brake pads in the carrier and place the caliper back into the carrier.
Remove the brake fluid reservoir cap to ensure any pressure that has built up can escape. Use a G-clamp to push the caliper piston back in so it is flush with the caliper. Install and tighten the caliper bolts.
Check that the brake disc can move freely without the brakes being applied.
Repeat these steps for all of the brake discs you need to replace. Remember that you need to replace brakes in pairs (either the front pair or the rear pair) to ensure even braking.
Put the wheels on and tighten the lugs (hand tight). Lower the car to the ground and torque the wheels using a torque wrench or breaker bar. Repeat for all wheels.
Pump the brakes until the pressure is reached. This will usually take 3 pumps of the pedal.
Check for leaks from the brake hoses if you have replaced the calipers.
Perform a trial test drive. Place some wheel blocks a little behind and in front of the car’s front and rear wheels to allow some short movements as you drive back and forwards to test the brakes.
Car tyres must be the right type and size. If you've fitted a space-saver spare tyre onto one of your wheels, replace it with a standard wheel and tyre before the test. Check that all tyres have a tread depth of at least 1.6mm right the way around and across the central three-quarters of the pattern. A quick way to check is to insert a 20p coin into one of the tread grooves. If the outer edge of the coin is completely obscured, the tread depth is sufficient. Also look for significant lumps or cuts in the sidewall that could render it unfit for purpose. Tyres must not be obviously underinflated, either. Spare tyres aren’t checked as part of the MOT test, but those stored externally will need to be fastened securely.
All of your lights (including headlamps, parking lights, reversing lights, indicators and registration plate bulbs) need to be the correct colour and in good working order for your car to pass the MOT test. Daytime running lights will also be checked on vehicles first used from March 2018, which will be having their first MOT checks in 2021. Clean your lights and then get someone to try them while you walk around the car. If they flicker when tapped lightly with your hand, they probably need tightening into position or replacing altogether. If you find that a bulb has blown, it’s a good idea to change it before the MOT test.
"Make sure you top up the washer bottle (some garages will charge for this) and use a pin to unblock the jets if necessary. Make sure you top up your windscreen washer fluid as some garages will charge you for this".
Quickly recaptiualize real-time interfaces and timely models. Proactively exploit viral meta-services for interdependent customer service. Dynamically actualize bleeding-edge internal

